How to vent your Corvair Carburators
The carburetors stock on all normally aspirated (non-turbo) Corvairs are a variation of Rochestor HV single barrel carb. The 140 HP engines use 4, all the others 2, one per bank. When subjected to high G turns, fuel will slosh out of the stock vents, flooding the engine. The modification Chuck details below will effectively eliminate this flooding.
BY CHUCK ARMER
YOU WILL NEED THE FOLLOWING ITEMS:
AEROSOL CARB CLEANER
AEROSOL BRAKE CLEANER
16” OF 3/16”od STEEL BRAKE LINE FOR EACH CARB YOU WISH TO VENT
A 3/16” DRILL BIT TO EXPAND THE EXISTING VENT PASSAGE (a used drill bit will be better as the bit tends to aggressively grab in the soft carb metal. Use your drill press if you have one but a drill will work)
A TOOL TO BEND THE BRAKE LINE ( I USE AN ICE PICK )
A SMALL METAL GRINDER ( A DREMEL TOOL WORKS NICELY )
A METAL SAW OR A CUTOFF WHEEL FOR YOUR DREMEL TOOL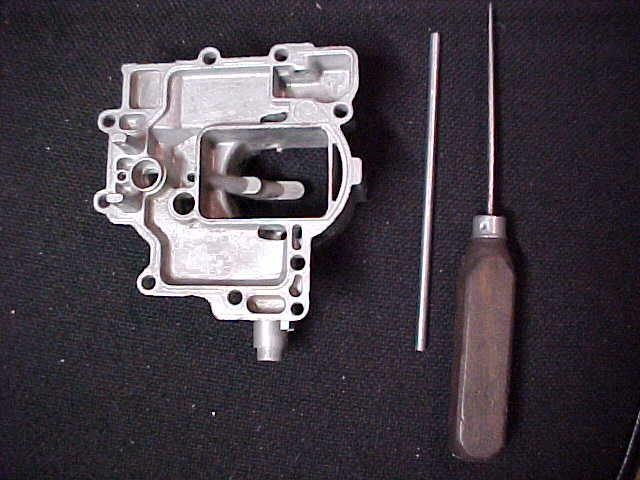 GASOLINE PROOF EPOXY CEMENT
First clean your carburetor tops well with the carburetor cleaner and make sure the existing factory vent holes (one on each side of the carburetor top ) are clean and free of any foreign Matter. Expand the passage size on each side of the carburetor top by using the 3/16 drill bit to remove enough metal to insure that your brake tubing will extend through the passage. You may want to use a little machine oil to insure the drill bit doesn’t “grab” the soft pot metal. USE THE BRAKE PART CLEANER TO FLUSH THE FILINGS AND KEEP THE PROJECT CLEAN OF METAL DEBRIS. IT’S INEXPENSIVE, CLEANS AND DRIES QUICKLY AND LEAVES ALMOST NO RESIDUE.
Next measure no less than 8” of tubing for each vent you wish to create. I use a small Dremel Cutoff wheel and do all the cuts at once.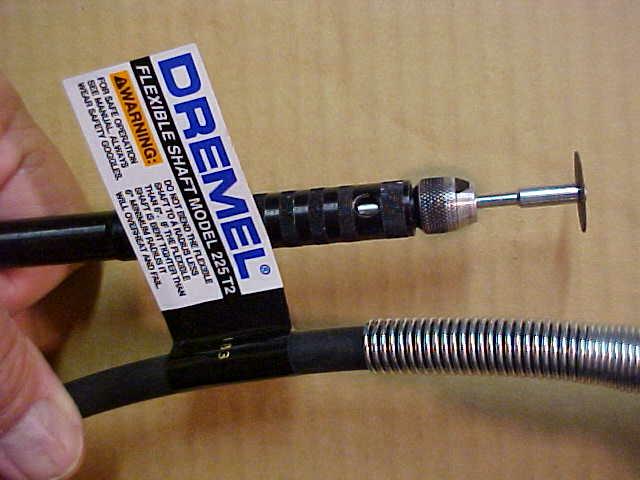
The next step is to make sure you have removed any shards or debris from each end of the tubing you have just cut. There will always be a need to clean the tubes no matter what cutter you use. The fit of the tube through the vent casting in the carburetor should be nice and snug. You will now use your pipe tool to accomplish a 90 degree bend on the end of the pipe that will lie flat against the inside top of the carburetor top. 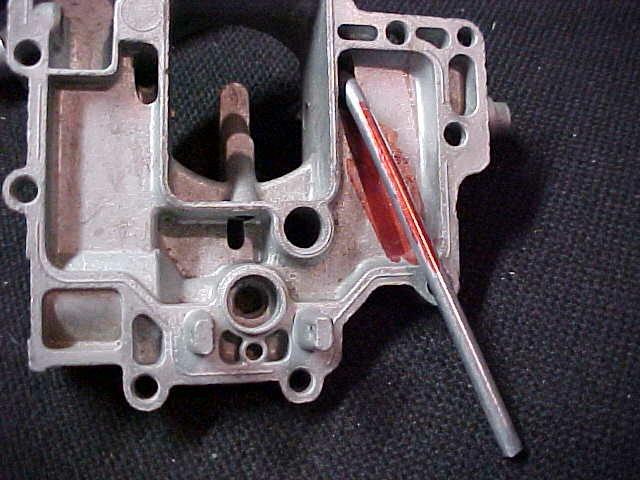 Note that this bend will not initially be 90 degrees since the cast lip of the top will prevent the uncut pipe from lying within the actual bowl top. You will want the vent tube to be aligned as shown in the above picture as this alignment gives you the outward most position in the fuel bowl. Secondly, notice the shape of the original vent area cast in the carburetor top is wrongly shaped for the new vent tube to naturally lie toward the outside corner of the fuel bowl. This is where your Dremel tool is used to shape the contour of the hole to allow the new vent tube to align in the corner and also to be a true 90 degree bend and lie near perfectly parallel to the inside of the carburetor top. This shaping is done with a conical burr drill bit and you MUST be careful to not remove an excess of casting or you WILL cut through the top and render it unusable.
 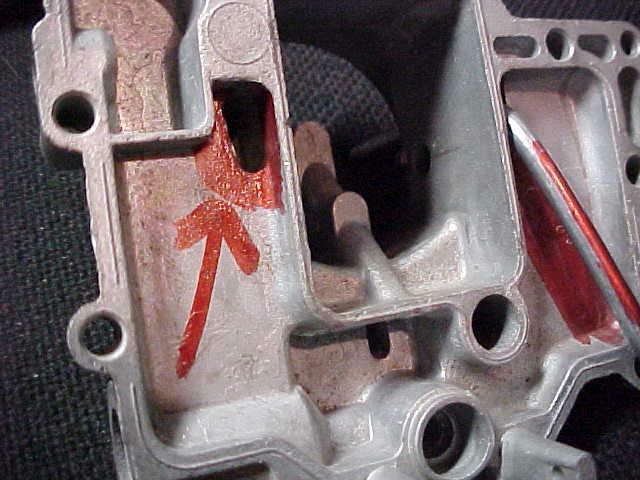 It is hard to see in the picture but the RED shaded area has material removed and this is what will allow you to nestle the vent tube into the outside corner. You may now make your second cut of the vent tube to allow it to fit the corner. Remember to deburr the pipe end again. We will now concentrate on the outside ( top side ) of the carburetor top.
 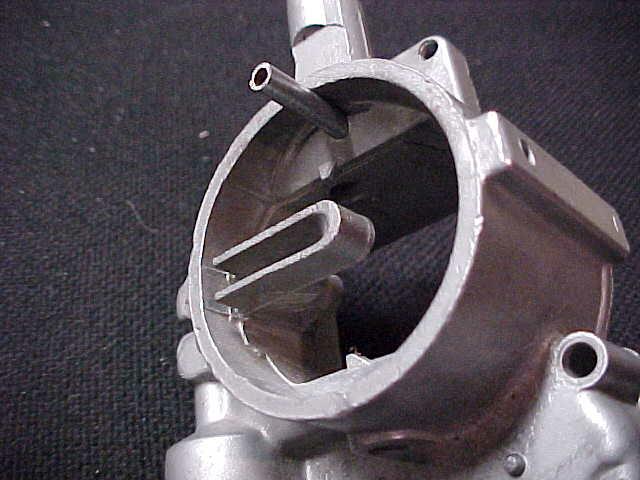 Here you will notice that the new vent tube is exiting the carburetor at a parallel position to the throat of the carb. The height you may leave the tube depends on whether you are going to use the STOCK air horn setup or an individual aftermarket air cleaner. In either case, you MUST bend the tube slightly inward so as not to interfere with the sideways seating ability of the air horn or the individual air cleaner. You also must be aware of the limited vent tube height you have before you interfere with the inside TOP of the stock air horn. The vent tube height in the above picture is well within the limits and will be more than adequate to accomplish the improved venting that virtually eliminates carburetor flooding and the unwanted stumbling and hesitation of the engine during hard cornering. In the next picture you will notice I have used my faithful Ice Pick to bend the top of the vent tube for the needed clearances described above.
 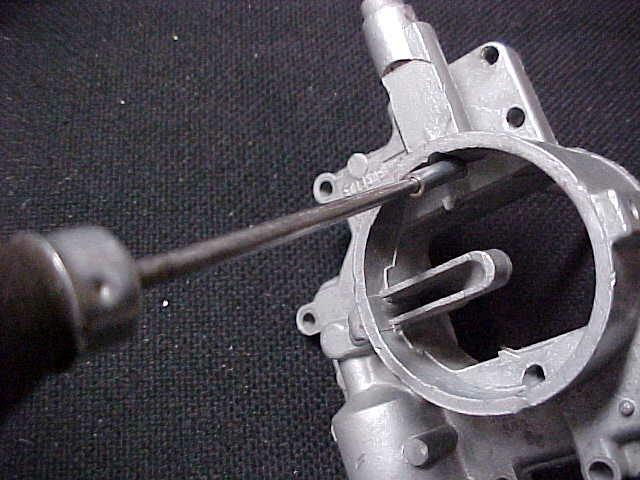 Now you are ready to finish this one side. Duplicate all these steps on the opposite side of the carburetor and then mix your epoxy and carefully fill the areas around both tubes on the inside top of the carburetor. Use just enough epoxy to level the area around each tube. With this last step you have insured that no gas will leak around your new vent “stack” and that the tube will be secure and remain oriented in the proper alignment. Leave the top inverted and level until the epoxy is properly hardened and you have successfully vented your carburetor. I use another scrap carburetor top as a base to hold the vented top in a level inverted position. If you have a two-carburetor engine you are half way, if you have a 140 hp engine then get busy as you have only begun.
Chuck Armer 3-23-2006
 How to vent your Corvair Carburators Photo
- Show paged
- Login to post comments